Show Me: Ultra| Widget Connector |
|---|
| overlay | youtube |
|---|
| _template | com/atlassian/confluence/extra/widgetconnector/templates/youtube.vm |
|---|
| width | 400px |
|---|
| url | https://www.youtube.com/watch?v=BHzpkChSREc |
|---|
| height | 300px |
|---|
|
Tell Me: UltraYou can create a rubric from two different places: On the assignment, test, or discussion page, select the Settings icon to open the Settings panel. You can create, edit, copy, delete, and review existing rubrics from your gradebook. Rubrics are listed in alphabetical order.
You may associate only one rubric to each assignment, test, or discussion. Assessments cannot have any questions for a rubric to be attached. Scroll down to the Additional Tools section. Select Add grading
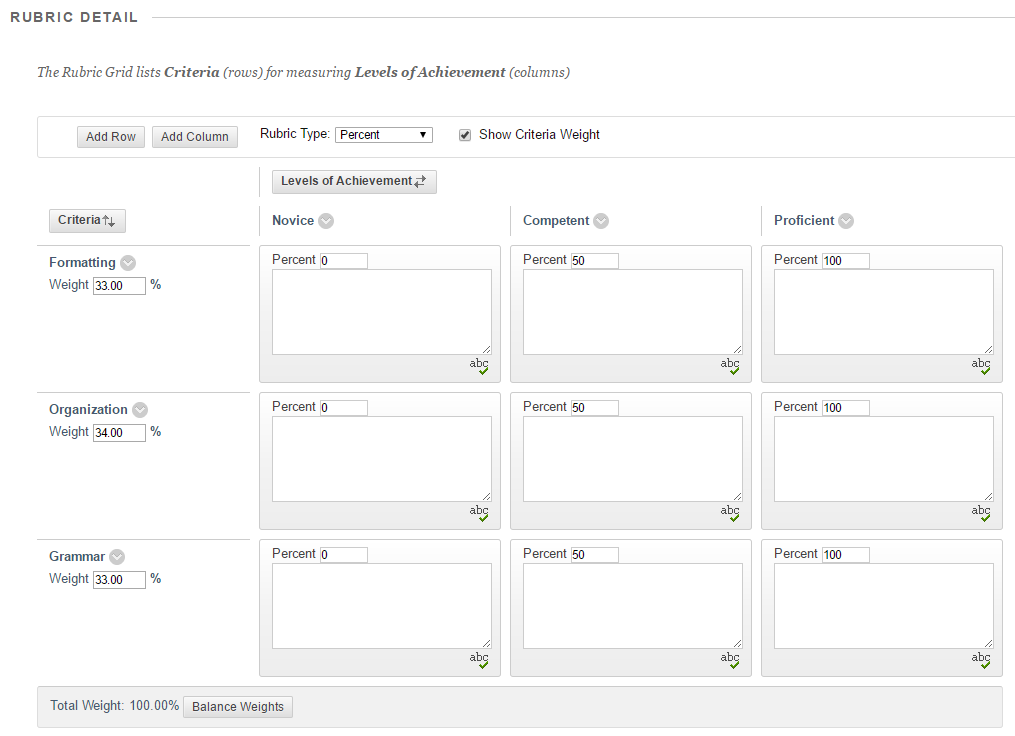
rubric → Create rubric → Create New Rubric. On the New Rubric page, type a title with a limit of 255 characters. If you don't add a title, "New Rubric" and the date appear as the title. Select a Rubric Type: Percentage or Percentage Range, Points or Points Range.
 Image Removed Image Removed
 Image Added Image Added
Point to a cell to access the edit and delete icons. You can add, delete, and rename the rows and columns. By default, four criteria rows and four achievement level columns appear. Select the plus sign wherever you want to add a row or column and type a title. If you don't want the new row or column, you can delete it. Press ENTER to confirm you are finished with the rubric. Your work is saved and you will leave edit mode.
| Info |
|---|
Ultra rubrics have some limitations: Maximum of 15 rows and 15 columns can be created. Achievement titles have a 40-character limit. Criteria and description cells have a 1,000 character limit. You cannot add HTML code to titles and cells. You can paste text from another document; however, formatting does not carry over.
|
|