Tell Me
| Info |
|---|
| Creating a VoiceThread assignment is a multi-step process. See the details below to create your assignment. |
STEP 1: Add a VoiceThread link to your Blackboard course.
- Log into Blackboard and access your Blackboard course. Select the instructions below for adding a VoiceThread link in a Blackboard original or a Blackboard Ultra course.
For Blackboard Original:
...
| title | Original Courses |
|---|
...
For Blackboard Ultra:
...
| title | Ultra Courses |
|---|
...
Tell Me
| Info |
|---|
| Creating a VoiceThread assignment is a multi-step process. See the details below to create your assignment. |
STEP 1: Add a VoiceThread link to your Blackboard course.
- Log into Blackboard and access your Blackboard course. Select the instructions below for adding a VoiceThread link in a Blackboard original or a Blackboard Ultra course.
For Blackboard Original:
| Expand | ||
|---|---|---|
| ||
|
For Blackboard Ultra:
| Expand | ||
|---|---|---|
| ||
|
STEP 2: Configure Your Activity
...
| Expand | ||||||
|---|---|---|---|---|---|---|
| ||||||
Require students to watch a VoiceThread in full. This is a great for:
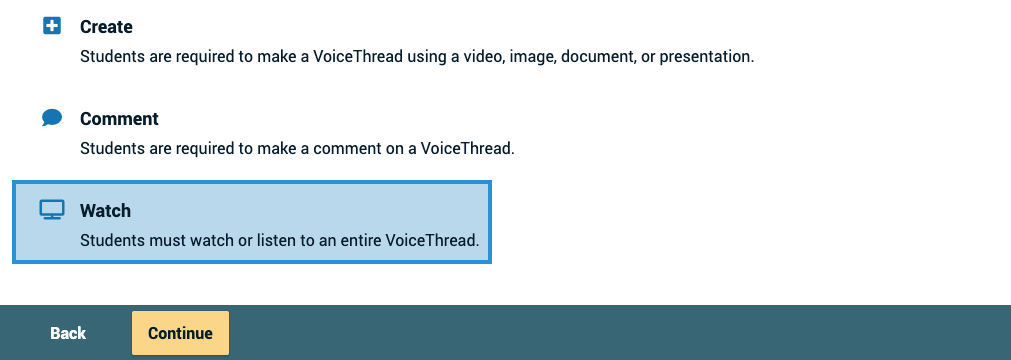
Step 1: Choose Activity Click on the Watch button,
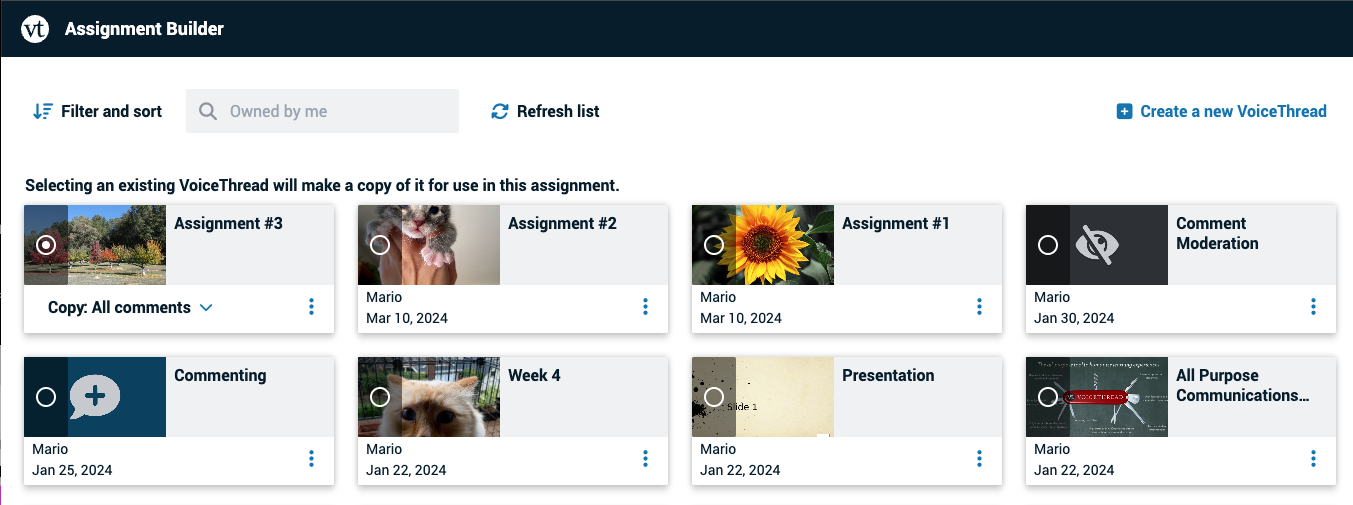
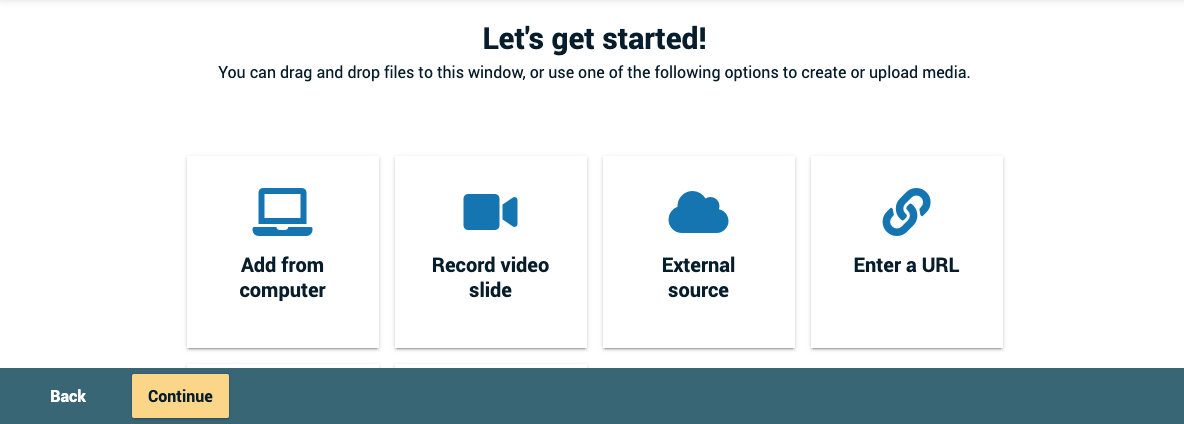
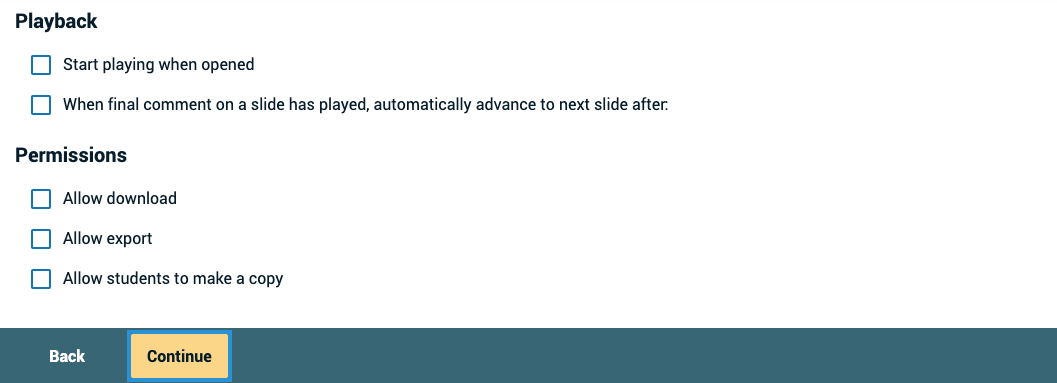
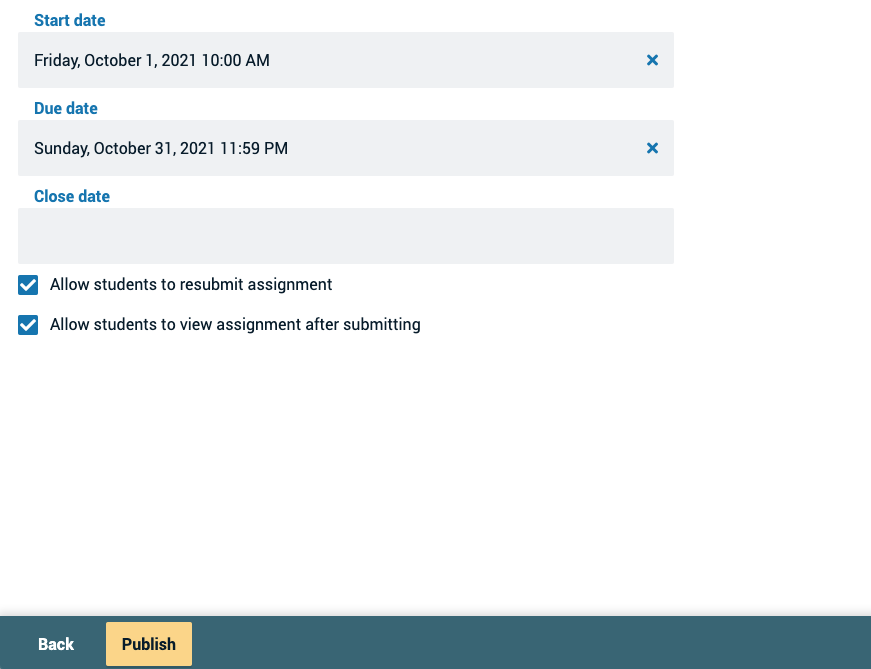
Step 1: Choose Activity Click on the Watch button, then click “Continue” at the bottom of the screen. Step 2: Choose content Select which VoiceThread you want to use for this assignment. Students will be required to watch 100% of all slides and comments. To use an existing VoiceThread, select from any of the ones you have created or that you can edit, and then click “Continue” at the bottom of the screen. Step 2: Choose content Select which VoiceThread you want to use for this assignment. Students will be required to watch 100% of all slides and comments. To use an existing VoiceThread, select from any of the ones you have created or that you can edit, and then . This will take you to the page where you can make any edits necessary. Once you choose the VoiceThread you want to use, a copy of that VoiceThread will be made to use in this assignment. You will continue to own the clean original. If you haven’t created the VoiceThread you want to use yet, click on “Create a new VoiceThread” in the top-right corner. This will take you to the create page, where you can upload new slides and click “Continue” at the bottom of the screen. This will take you to the page where you can make any edits necessary. Once you choose the VoiceThread you want to use, a copy of that VoiceThread will be made to use in this assignment. You will continue to own the clean original. If you haven’t created the VoiceThread you want to use yet, click on “Create a new VoiceThread” in the top-right corner. This will take you to the create page, where you can upload new slides and click “Continue” at the bottom of the page to open the VoiceThread and record comments. Step 3: Choose options Select the playback settings you want your VoiceThread to have.
Click “Continue” at the bottom of the screen when you’re done. Step 4: Finalize Set the final details for your assignment.
Click “Publish” at the bottom of the screen when you’re done. |
...
page to open the VoiceThread and record comments. Step 3: Choose options Select the playback settings you want your VoiceThread to have.
Click “Continue” at the bottom of the screen when you’re done. Step 4: Finalize Set the final details for your assignment.
Click “Publish” at the bottom of the screen when you’re done. |
STEP 3: Refresh Blackboard and Edit Your Link
- Once you have finished setting up VoiceThread, refresh Blackboard to see the new VoiceThread link appear in your course. Click on the overflow menu (...) on the far right of that VoiceThread link.
- Click EDIT to modify the VoiceThread settings in the Ultra course, including the link name and grade book settings.
STEP 4: Wait for Students to Submit
When students go to your assignment, they will see the interface to complete the required work and submit. For details, visit the assignment guide for students.
STEP
...
5: Grade Student Submissions
| Expand | ||
|---|---|---|
| ||
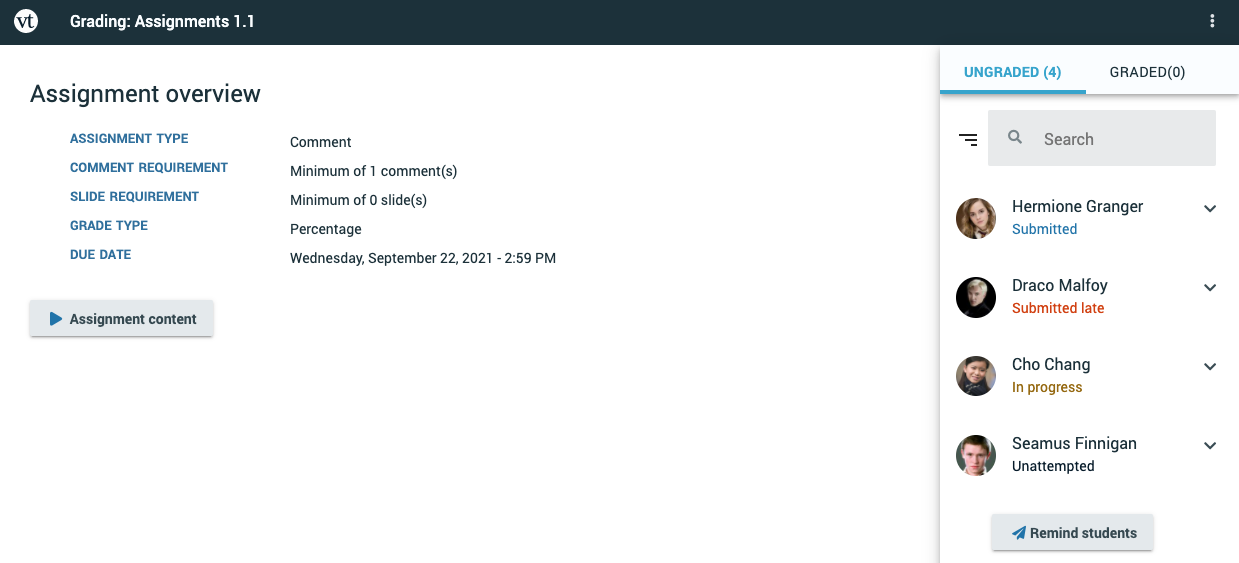
To grade your students’ submissions, just return to the assignment you have set up. You will see the grading interface automatically. On the right side of the page, you will see your course roster. If a student is missing from the roster, it means that student has not clicked into your assignment at all yet, but they will appear as soon as they do. Students can fall into three categories:
You can enter grades for students who are listed as “Submitted” or “In progress.” Click on a student’s name to see their submission, then enter the grade into the text box or pass/fail selector on the right and press Enter on your keyboard. Additional features:
|
...


